Designer Indian Wedding Lehengas and more

by neha
8 Comments inspirations, Lehengas and Sherwanis, Trousseau, wedding planning

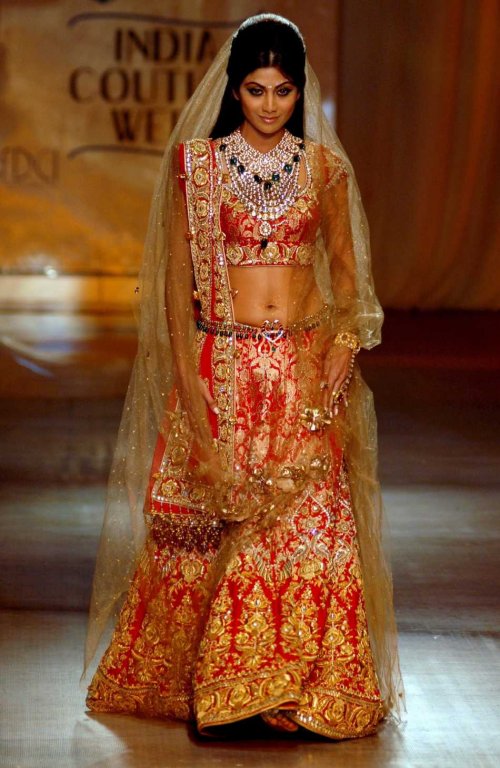
Keep up with the hottest trends in the Indian Wedding Industry. As you try to find that perfect wedding outfit, here are some designer wedding lehengas for inspiration.

Shilpa Shetty in an absolutely stunning Tarun Tahiliani Wedding Lehenga

Another gorgeous Tarun Tahiliani Lehenga

Another Tarun Tahiliani

Karishma Kapoor donning a beautiful red Manish Malhotra lehenga

Pink and Green Lehenga by Manish Malhotra

Rakhi Sawant wearing a Neeta Lulla Lehenga

Sabyasachi definitely has his own signature style, which is reflected in this outfit

This lehenga is drop dead gorgeous! Check out the train - love it!

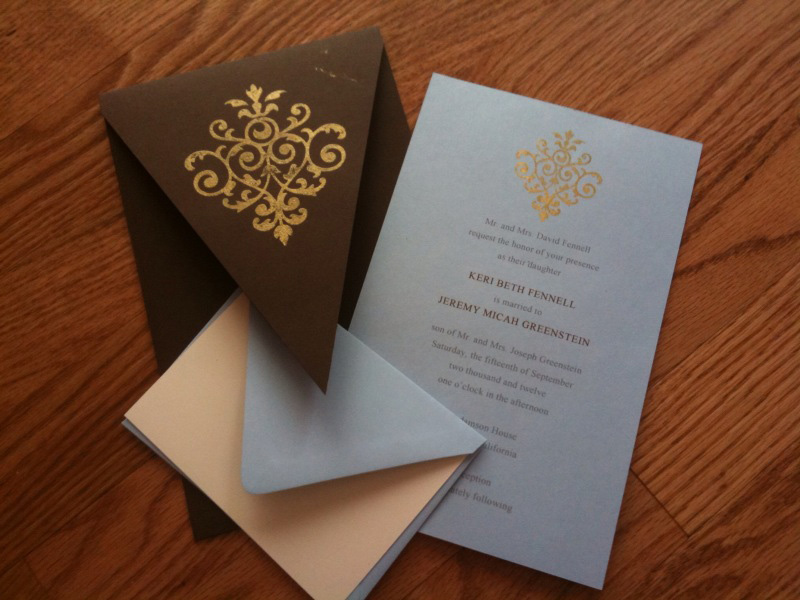
Contemporary Invites for the DIY Bride

by neha
5 Comments DIY Projects, inspirations, invitations

This DIY tutorial will illustrate some unique techniques to create invitations. We will talk about rubber stamping and embossing. I will make some product recommendations, and also go through the steps.

Our end product will look like this:

Pointed Flap Enclosure with Embossed/Rubber Stamped Invited

Supplies:

1. Pointed Flap Enclosure (Chocolate)

◦ 5 1/2″ x 8 1/2″

◦ Special Feature = Makes a lovely presentation for wedding invitations and other special occasions.

2. Flat Paper (blue, lavendar, fuschia, white, ivory, cream)

◦ 8.5″ x 11″

3. Outer Envelope

◦ A9 ( (5 3/4″ x 8 3/4″)

4. Rubber Stamps (Same pattern, but in 2 different sizes) – Big Rubber Stamp, Small Rubber Stamp

5. Ink Pad, Clear for Embossing

6. Embossing Powder (We will use gold for this example)

7. Embossing heating tool

8. Paper Cutter

9. Pair of Scissors

10. Pencil

11. Ruler

Steps to create the invitation:

  1. Open a word Document in Microsoft Word on your computer. Change the orientation of the document to landscape by going to Page Setup.
  2. Make a table with one row and two columns on the document, such that one cell is 5 1/2″ wide and 8 1/2″ long in dimensions.
  3. Type out your invitation text in each of the cells using your favorite font. You can use Da Font to find some beautiful fonts that are not available out of the box.
  4. Print out the document on the Flat Paper (8 1/2″ X 11″).
  5. Using paper cutter, cut out the paper along the edges of the document you created.
  6. Now take each individual invitation, rubber stamp and ink pad. Apply clear ink to the smaller rubber stamp and apply it at the top center of the invite.
  7. Now we will begin the process of embossing. We will take the gold embossing powder and pour it over the stamped area. The powder will stick to the stamped portion. Now remove the excess powder by pouring it back on another sheet of paper.
  8. In order to emboss the stamp, we will use the heating tool. Plug the heating tool and test the temperature on your hand. Once its hot enough, then use it like a hair dryer over the stamped area with the embossing powder on it. You will notice that the stamp area will start getting embossed.
  9. Repeat the last three steps on the flap of the pointed envelope with the bigger stamp.
  10. Once the embossing has dried out, you can place the invite, along with the enclosures for RSVP, in the pointed inner envelope.
  11. Use the outer envelope to address the invitation.
  12. Note: Please make a sample or two before you buy supplies in bulk. Also, you can get the printed paper cut in bulk at Kinkos.

Your invitation is now ready! It is simple and elegant. The stamp looks Indian, but contemporary. Get ready to wow your guests!


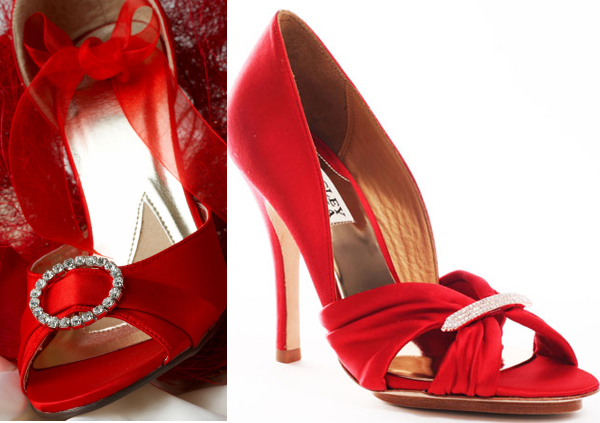
Wedding shoes galore!

by neha
3 Comments Advice, tips

While you want your wedding shoes to be gorgeous, you also have to be practical. You will be wearing them for a really long time and you have to make sure that they are comfortable. Jewels on wedding shoes look gorgeous, and you can achieve a good combination of gorgeous and comfort. If you want comfort, then you can go for shoes which have jewels on the center or side, as opposed to all over. There are many options to choose from. Here are some inspiration boards which can spark some ideas when selecting the perfect pair of shoes for your wedding day.

Summer Wedding Flowers

by neha
3 Comments centerpieces, decor

Summer is one of the most popular seasons to get married in. Summer weddings look gorgeous as there is an abundance of flowers to choose from. Since most blooms are in season, you don’t have to fly them in from other countries and it is cheaper to get your flowers during this time. In this post we will look at some popular summer flowers.

Asiatic Lilies

  • Asiatic Lily: These lilies stand for pride, purity, innocence and beauty. Asiatic Lilies look very welcoming and will definitely warm up the room. They come in white, pink, yellow and orange.

Chrysanthemums

  • Chrysanthemum: These flowers represent what every marriage should be filled with: cheerfulness, optimism, truth, long life, joy. Chrysanthemums are very symbolic and definitely a great choice. They come in white, yellow, orange, pink and other colors.

Delphinium

  • Delphinium: This flower represents an open heart and are very welcoming. They come in in white and blue.

Lavender Centerpiece with Roses and Chrysanthemum

  • English Lavender: This flower denotes purity, and devotion. They are known for their lovely fragrance and therapeutic uses. English Lavender will definitely relax your guests. They come in purple.
  • Forget-me-not: This flower symbolizes true love, hope, remembrance, and memories. They Come in the color blue.

Freesia

  • Freesia: Freesias mean innocence and thoughtfullness. They come in white, yellow, pink, blue and purple

Gerbera Daisies

  • Gerbera daisy: Representing innocence and loyal love, they come in pink, yellow, orange, red and white

Hydrangea

  • Hydrangea: This flower stands for understanding and comes in white, blue, purple and pink. They look absolutely stunning because the flower is big and full.

Rose Pomanders

  • Rose: Love. One of the most common, but romantic flowers, roses do not need much description.Come in a whole variety of color.

Sunflower Inspiration Board

  • Sunflower: Sunflowers are bright and bring warmth and cheer. It gets its positive qualities of friendliness, happy thoughts and fuzziness from its resemblance to the sun. The bright yellow colored flower is exuberant.

Tuberose

  • Tuberose: These flowers are very fragrant and represent pleasure. They come in white.

Violet Inspiration Board

  • Violet: Modesty, faithfulness, innocence, beauty – these are the qualities associated with Violets.

Zinnia

  • Zinnia: Lasting Affection, Goodness, Thoughts of Absent Friends, Remembrance are what Zinnias are associated with. Comes in red, orange and pink.

Cymbidium Orchids

  • Orchids: Orchids don’t do too well in extreme temperatures. During summer, you may be worried that the orchids will dry out. However, cymbidium orchids are one of the most wilt-resistant flowers that can be used during the summer season.

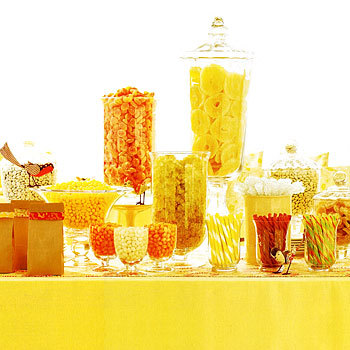
Wow your guests with a Candy Buffet

by neha
2 Comments colors, decor, Favors

Candy buffets are the hottest trend in weddings these days. Not only do they satisfy the cravings of that sweet tooth, but also make for great eye candy at your wedding reception. They make a unique alternative to favors and also serve as late night snacks. So how do you go about creating these lovely candy buffets? The key points to remember when creating a candy buffet are: colors, presentation and quantity of candy. Let’s go in more detail.

Image Credit: Things Festive

Colors: Try to pick candy using your wedding color palette. If your colors are pink and white, go with the fairy tale theme for your table, where you go with bubble gum flavored candy, pink and white jelly beans, pink and white chocolate eggs etc. It might require some research, but you can find candy in shades that complements your wedding colors!

Presentation: The display of your candy buffet is equally important as your colors. The whole purpose of having a candy buffet is to add color and another element of decor to your wedding. The options are endless! However, some easy options might be to use similar vases as your centerpieces. Add some unique touches by using huge martini glasses or other shapes of floral vases. Vary the shapes and heights to make it look more dramatic. You could also add some bags of candy, for guests to take away with them. Often times, brides would accessorize the candy buffet with a separate centerpiece, fabric and ribbon.

Quantity: In order to have a perfect display, you need to have the right quantity of candy. One would think to start with the guest count in order to determine the quantity. I would say no! If you have 100 guests at your wedding and you decide to serve 3 ounces of candy to each guest, that is just going to be 18.5 pounds. This is not enough to have a good display! For a presentation of your buffet that will wow your guests, choose from 5 to 10 types of candy and buy around 15 pounds each – even if you don’t need that much. When it comes to candy, the more the merrier!

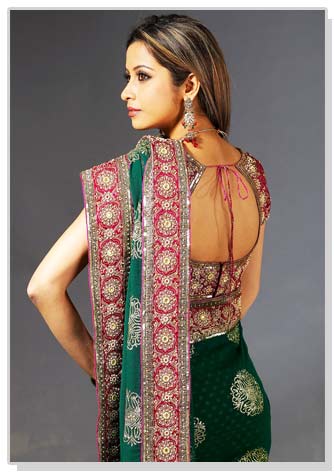
Latest Saree Blouse Styles and Cuts

by neha
4 Comments inspirations, Wedding Saris

Gone are the days when there was just one boring style to wear a saree blouse. Today, there are a number of options to choose from. Everything in a saree blouse is customizable from the cut of the neck/back to the style of the sleeves. A saree blouse is a statement! Here are some blouses for inspiration when you are choosing a blouse style for your wedding outfits.

Image Credit: IndianWomenClothing.com

This is a traditional choli style blouse with hooks to secure and a string to tie the blouse at the back.

Image Credit: Indiwo.in

Another choli style blouse, but this time with a very deep back!

Image Credit: indianwonebclothin.com

A halter style net blouse with embroidery.

Image Credit: SareeDreams.com

Looking for a blouse that is more fashionable? Check out this halter blouse which has a collar and is secured by hooks at the back. If you like deep backs, you will love this blouse!

This halter blouse is made of brocade. A brocade blouse goes with almost any sari. If you do not want to wear your matching sari blouse and want something more trendy, then brocade blouses are definitely the way to go.

Check out this gorgeous bikini style blouse! Love the embroidery on the brocade.

Image Credit: SareeDreams.com

Check out this beautiful turquoise net blouse with stone work border on the bottom edge.

Image Credit: Flickr - radhikasarees

Check out the puff sleeved blouse below! Love the work on the blouse.

Long sleeved blouses are in! Whether it was Vidya Balan’s blouses in the movie Paa or Kareen Kapoor’s choli in the Bollywood hit 3 Idiots, long sleeved blouses look very elegant and stylish.

Check out Deepika Padukone donning a long sleeved blouse in Om Shanti Om:

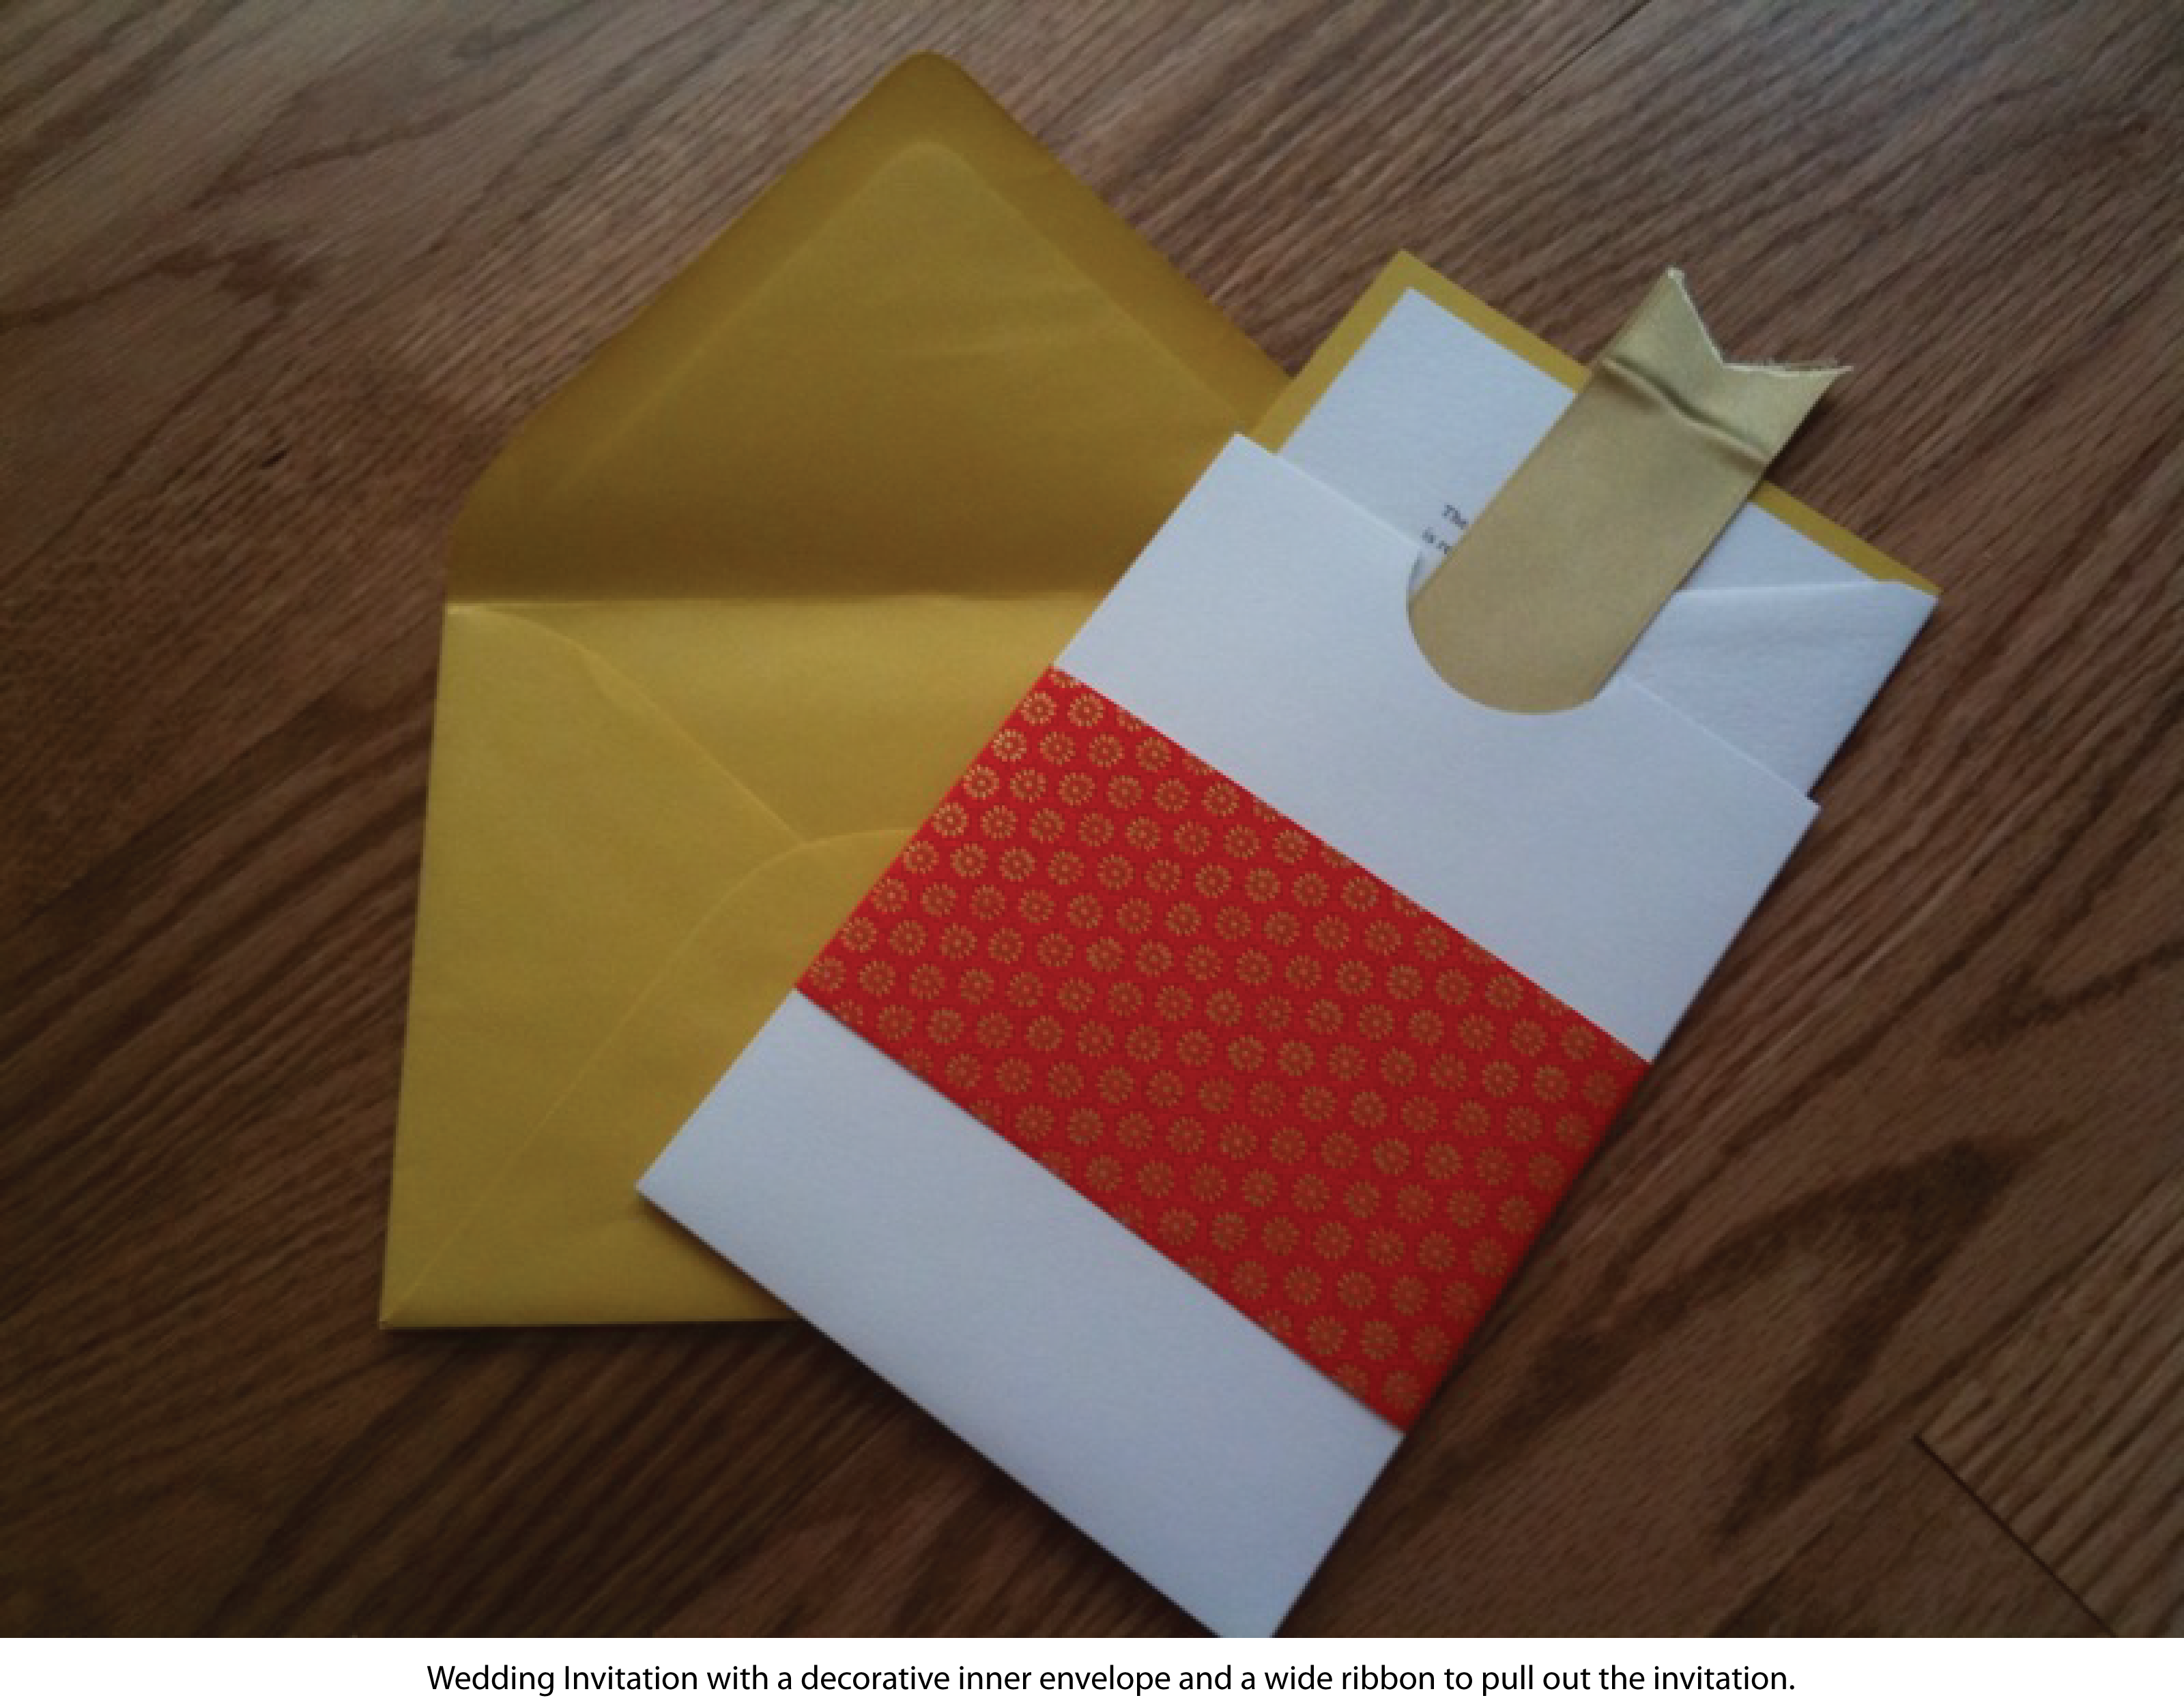
How to make your own DIY Wedding Invitation

by neha
5 Comments DIY Projects, inspirations, invitations, stationary

Are you a creative bride? Do you want to add your personal touch to your invitations? Do you want your invitations to be unique? Look no more! We have the perfect DIY invitation ideas, which will set your wedding invitation apart.  I will show you some techniques and point you towards some resources, with which you can make your own invitations very easily. Most of the supplies and inspiration that I have used for the invitation created in this blog post are from Paper Source. You can order your supplies from their online store, or go to their many locations around the country.

Our end product will look like the following:

DIY Wedding Invitation with Decorative Handmade Paper and Ribbon

Supplies:

  1. Half Moon Enclosure
    • 5″ x 7″
    • Special Feature = The half circle cut out allows a portion of your invitation to peek through the top – a great place to include a small graphic element.
  2. Flat Paper (white, ivory, cream)
    • 8.5″ x 11″
  3. Flat Card in color of your choice
    • A7 (5″ x 7″)
  4. Outer Envelope
    • A7 (5 1/4″ x 7 1/4″)
  5. Decorative Paper (or Handmade Paper)
  6. satin ribbon in color of your choice
  7. Paper Cutter
  8. Pair of Scissors
  9. Double Stick Tape
  10. Pencil
  11. Ruler

Steps to create the invitation:

  1. Open a Word Document in Microsoft Word on your computer. Change the orientation of the document to landscape.
  2. Make a table with one row and two columns on the document, such that one cell is 4 3/4″ x 6 7/8″ in dimensions.
  3. Type out your invitation text in each of the cells using your favorite font. You can use Da Font to find some beautiful fonts that are not available out of box.
  4. Print out the document on Flat Paper (8.5″ x 11″).
  5. Using the paper cutter, cut out the paper along the edges of the document you had created.
  6. Mount the Flat Paper on the A7 Flat Card using double stick tape. This creates a contrast and a layering effect.
  7. Now take the decorative paper and cut out a strip of paper that is 3-4 inches wide and long enough, such that it wraps around the half moon enclosure completely.
  8. Using double stick tape, adhere the decorative strip around the half moon enclosure. This adds a beautiful accent to your envelope.
  9. Now take the wide satin ribbon which is 2.5 times the length of the half moon enclosure (approx. 12.5″). Make sure you cut the ribbon into a “V” shape, so that the edges don’t fray. It also makes it look more professional.
  10. Wrap the ribbon length wise along the invitation card, right in the middle, and insert it in the half moon envelope. The invitation can be pulled out using this ribbon and adds a nice touch to the invitation.
  11. Now put the invitation in the outer A7 envelope.
  12. Note: You can create your other enclosures for RSVP, directions in a similar fashion.

Your invitation is now ready to wow your guests! Let us know what you thought of this DIY tutorial.