Contemporary Invites for the DIY Bride
This DIY tutorial will illustrate some unique techniques to create invitations. We will talk about rubber stamping and embossing. I will make some product recommendations, and also go through the steps.
[ad#Google Adsense]
Our end product will look like this:

Pointed Flap Enclosure with Embossed/Rubber Stamped Invited
Supplies:
1. Pointed Flap Enclosure (Chocolate)
◦ 5 1/2″ x 8 1/2″
◦ Special Feature = Makes a lovely presentation for wedding invitations and other special occasions.
2. Flat Paper (blue, lavendar, fuschia, white, ivory, cream)
◦ 8.5″ x 11″
◦ A9 ( (5 3/4″ x 8 3/4″)
4. Rubber Stamps (Same pattern, but in 2 different sizes) – Big Rubber Stamp, Small Rubber Stamp
5. Ink Pad, Clear for Embossing
6. Embossing Powder (We will use gold for this example)
8. Paper Cutter
9. Pair of Scissors
10. Pencil
11. Ruler
[ad#Google Adsense]
Steps to create the invitation:
- Open a word Document in Microsoft Word on your computer. Change the orientation of the document to landscape by going to Page Setup.
- Make a table with one row and two columns on the document, such that one cell is 5 1/2″ wide and 8 1/2″ long in dimensions.
- Type out your invitation text in each of the cells using your favorite font. You can use Da Font to find some beautiful fonts that are not available out of the box.
- Print out the document on the Flat Paper (8 1/2″ X 11″).
- Using paper cutter, cut out the paper along the edges of the document you created.
- Now take each individual invitation, rubber stamp and ink pad. Apply clear ink to the smaller rubber stamp and apply it at the top center of the invite.
- Now we will begin the process of embossing. We will take the gold embossing powder and pour it over the stamped area. The powder will stick to the stamped portion. Now remove the excess powder by pouring it back on another sheet of paper.
- In order to emboss the stamp, we will use the heating tool. Plug the heating tool and test the temperature on your hand. Once its hot enough, then use it like a hair dryer over the stamped area with the embossing powder on it. You will notice that the stamp area will start getting embossed.
- Repeat the last three steps on the flap of the pointed envelope with the bigger stamp.
- Once the embossing has dried out, you can place the invite, along with the enclosures for RSVP, in the pointed inner envelope.
- Use the outer envelope to address the invitation.
- Note: Please make a sample or two before you buy supplies in bulk. Also, you can get the printed paper cut in bulk at Kinkos.
Your invitation is now ready! It is simple and elegant. The stamp looks Indian, but contemporary. Get ready to wow your guests!
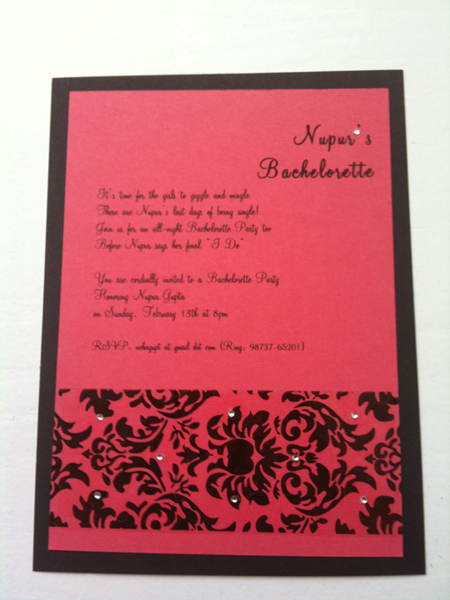 DIY Bachelorette Party Invitations in 8 Easy Steps
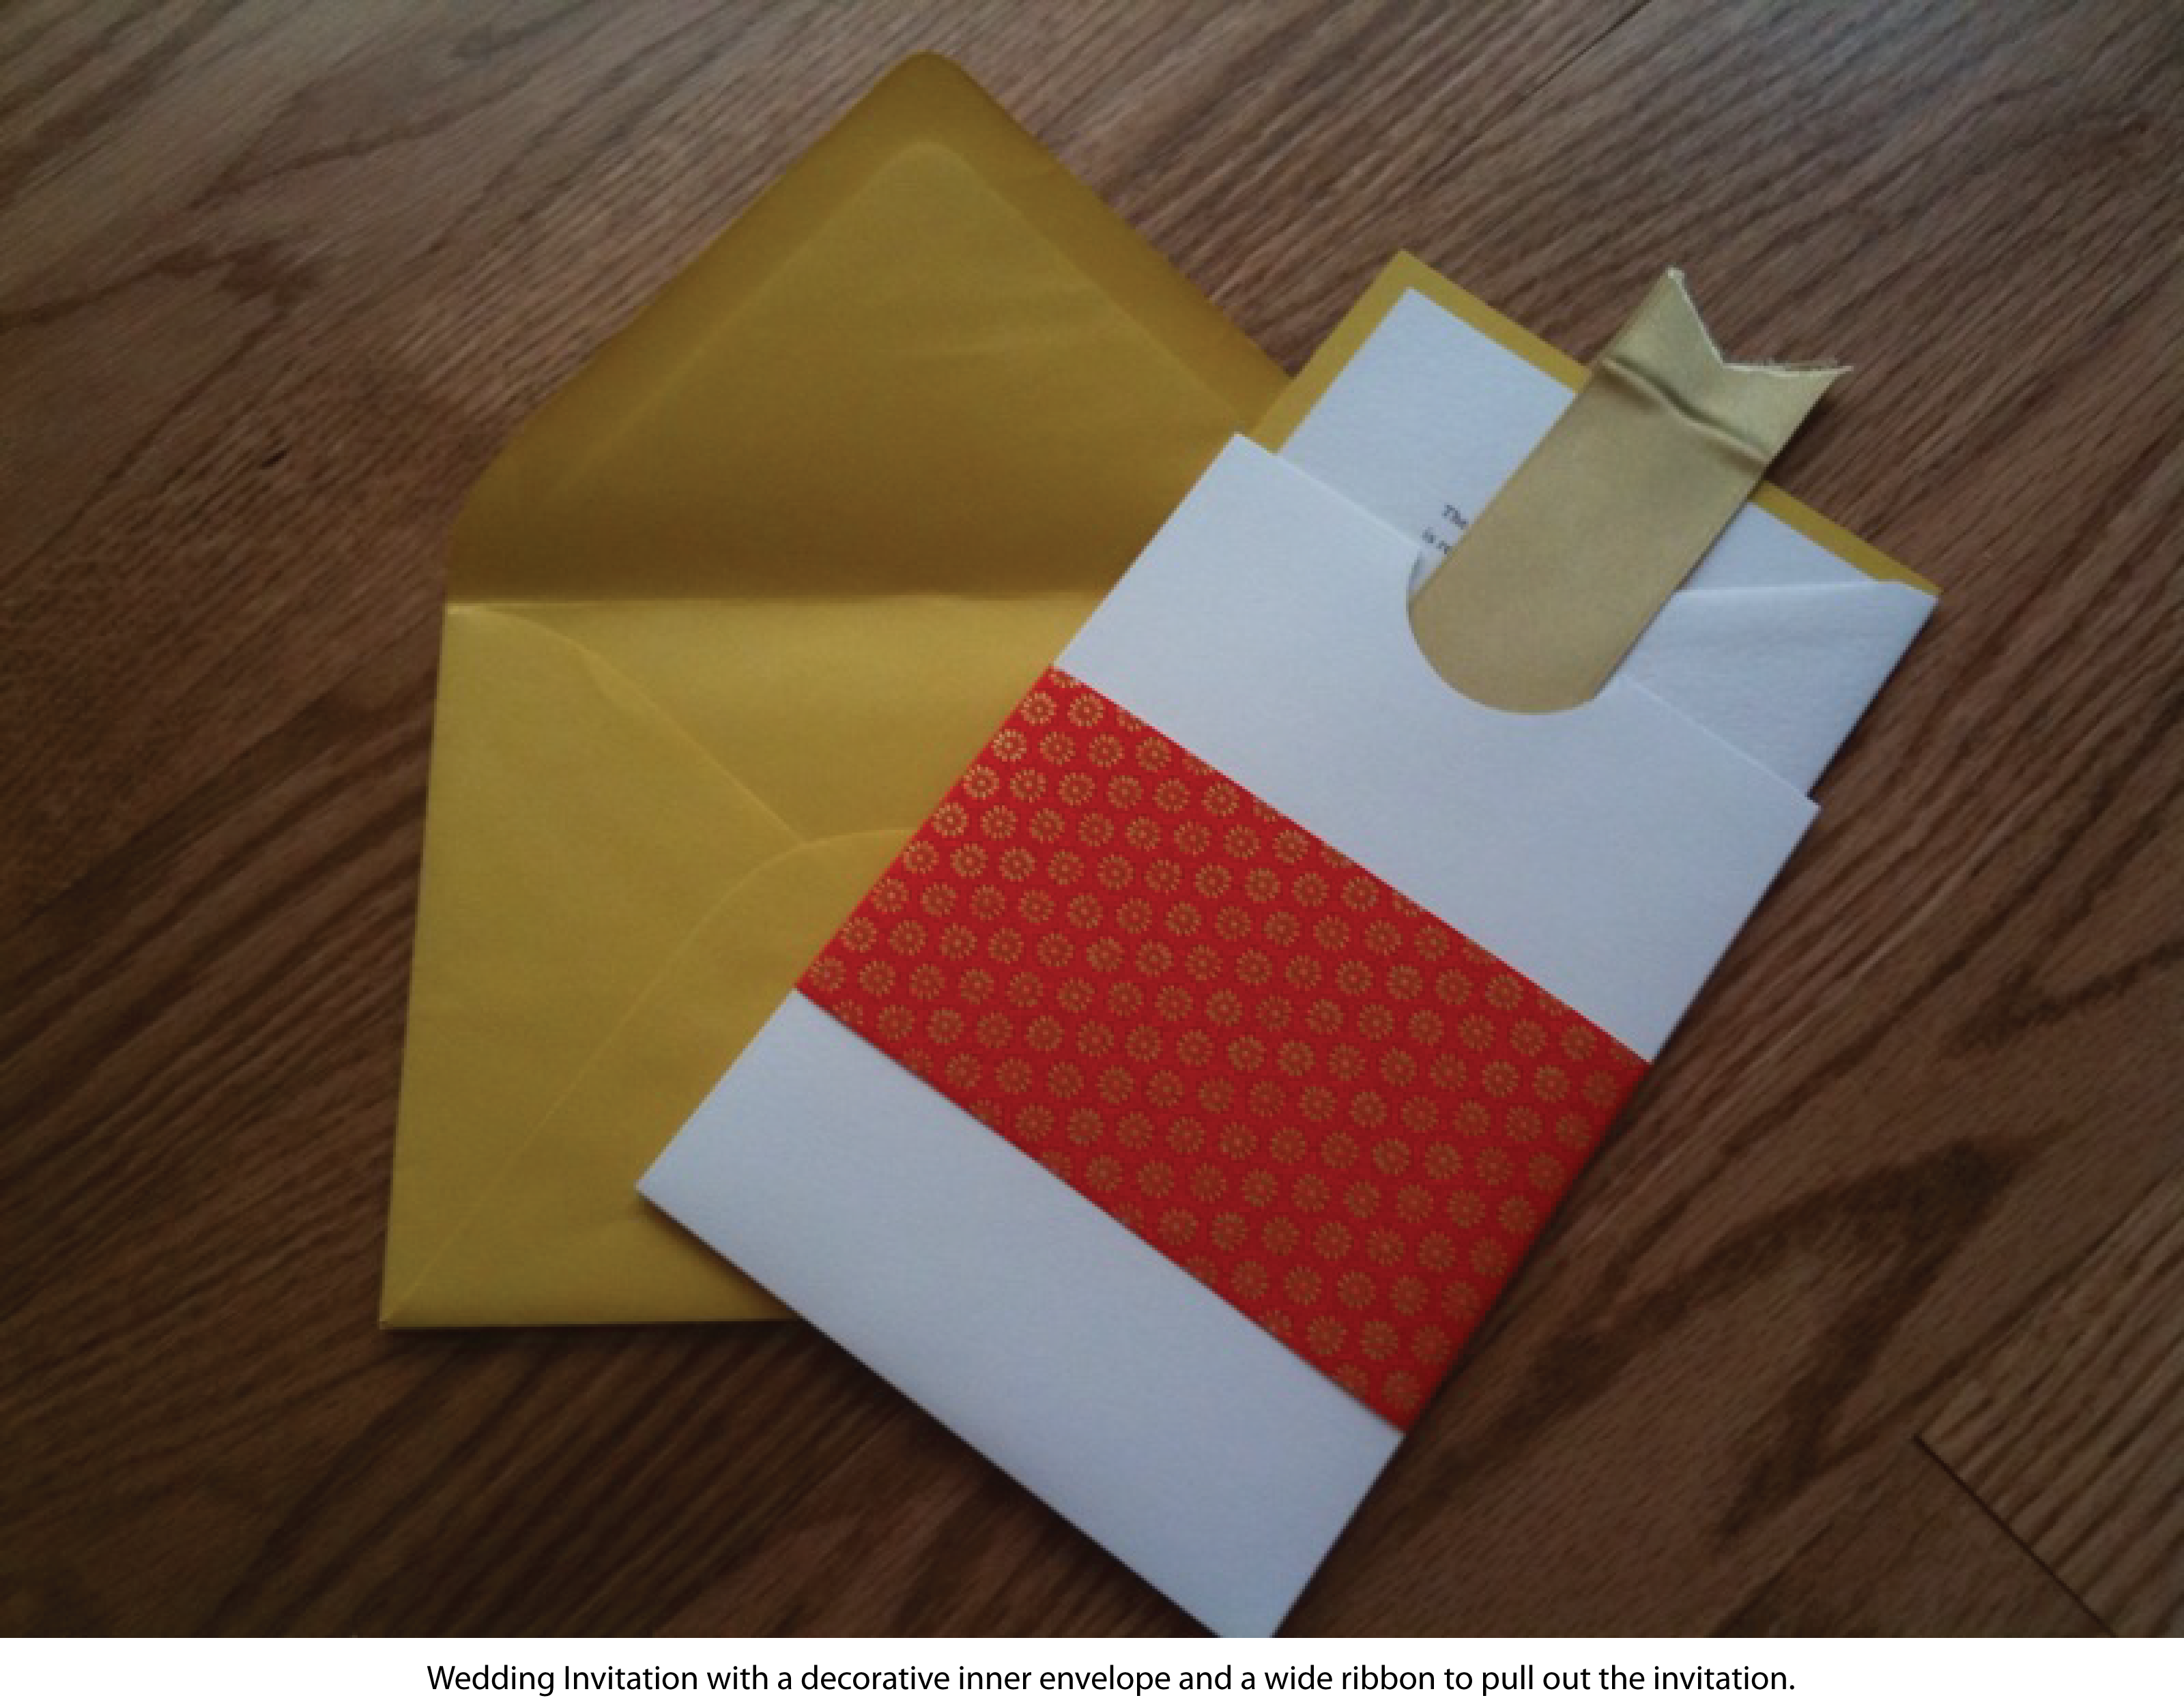 How to make your own DIY Wedding Invitation
neha says
Hi, Really like you website! Some very good ideas!! Love the shoes specially.. 🙂
I’m a photographer – cover niche weddings, portraits etc. http://neharamabhadran.com
Would love to share this link with my clients. Cheers! 🙂
neha says
Hi Neha! Thanks 🙂 I love your work that is on your website as well! Do you also do photo shoots in the US?
neha says
Hey,
Thanks! 🙂 At the moment most of my work happens in India and around Dubai.