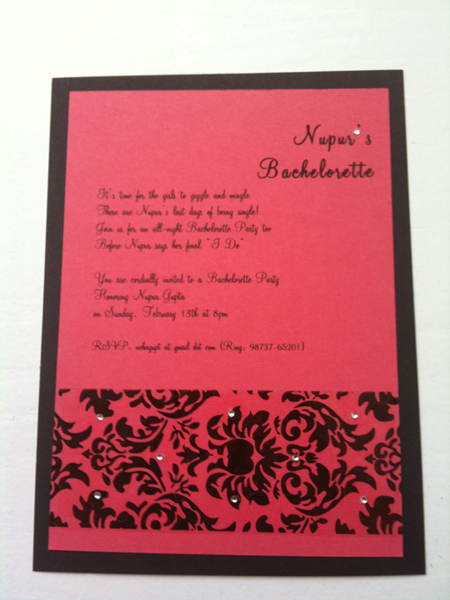
DIY Bachelorette Party Invitations in 8 Easy Steps

Bachelorette Party, DIY Projects, invitations 1 Comment

When my sister asked me to be the Matron of Honor for her wedding, I was super excited! One of the major tasks of MOH and Bridesmaids is to plan the bride’s Bachelorette Party. I decided to go all out and do a Damask theme – Black and Fuchsia DIY invitations for her Girls Night Out. In this blog post I will teach how to make your own DIY Invitations for a Bachelorette Party.


Read more »

Wedding of our dreams

Advice, DIY Projects, budget, inspirations, stationary, wedding planning 1 Comment

The following article is a guest post by Shaily. Shaily and her husband planned their wedding in six months. In this article she gives some very useful tips on how she and her husband went about their wedding planning process and have a wedding of their dreams. Hope you enjoy! Photo Courtesy: Sandeep Ingale of Bestphotog

Planning your wedding is both an exciting and stressful time.  It doesn’t matter whether you have six months or two years, there are still the same amount of tasks that need to be planned and executed.  My husband and I planned our wedding in just six months and it was most certainly a labor of love.  How did we do it?  We did it just like any other couple does by focusing on what matters the most to us and recognizing our limits and our budget.


First we started with the basics that every wedding needs: a priest, a venue and a caterer.  Once those were in  place, we focused on what meant the most to us: photography, entertainment and decor.  While we planned our wedding in six months, we did take some time prior to do our research to know that it was possible to take the plunge in such a short amount of time.  We made sure we vetted all of our vendors as thoroughly as we could via email prior to meeting them in person, thus reducing the amount of time spend traveling from meeting to meeting.  Meeting with our top 2 or 3 choices whether it was a photographer or venue really helped to maximize our turn around time on each vendor decision.

Second, it was really important to us that our wedding be a reflection of our personalities and be as personal as possible.  We decided to DIY our invitations and chose a theme that reflected both my Indian culture and my husband’s late father: paisleys.  We found a graphic we liked from iStockPhoto and leveraged both Adobe Illustrator and Photoshop to create our invitation suite.  We created all of our paper products from the invitations, programs, seating cards, menus and candy buffet bags.  We leveraged the theme through most of these items and stayed with the same color scheme to ensure that they all tied together. Read more »

Save-the-Dates: DIY Tutorial By Sneha

Advice, DIY Projects, Save-the-Dates, inspirations 2 Comments

The following post is by our guest blogger, Sneha Subrahmanian of My Shaadi Obsession. Check out her DIY tutorial to create your own Save-the-Dates!

Making our Save The Date’s was a lot of fun. We wanted to do something different so we created these minicard magnets!

Since our wedding date was on a popular long weekend, we wanted to send them out ~10 months in advance. We had just done an engagement session, so to create the save the date minicards, we picked 3 photos, including one from our formal engagement party to have a few different looks.
Here are the rest of the details: Read more »

Question of the week: Advice for DIYing Wedding Invitations

Advice, DIY Projects, Question of the Week, budget, invitations, wedding planning No Comments

Hello Lovely Ladies! Wedding Wednesdays just got more interesting on Marigold Events. We get many questions from brides asking for wedding advice. We will be selecting and answering “Question of the week” every Wednesday on Marigold Events. Ask your question by filling out our contact form on the right.

Q. I really want to DIY my wedding invitations. Can you give me some advice on how to go about making my own invitations?

A. Dear Bride-to-be: It is wonderful that you want to DIY your wedding invitations – they are a lot of fun. Here is some advice on how you can go about making your own invitations.

Make Samples

Start out by test driving the whole DIY invitations project. Get ideas and inspiration from your local Arts and Crafts stores and Paper stores. Do not buy paper in bulk until you are a 100% sure that you want to go the DIY route. A lot of stores would not let you return the paper because of restocking issues. You should try to produce at least a couple of different samples before you pick the final invitation. You can have your fiance and family vote on the different samples. Read more »

Question of the week: Planning an Indian wedding on a budget

Advice, DIY Projects, Lehengas and Sherwanis, Planning Checklist, Question of the Week, Wedding Saris, budget, cake, centerpieces, decor, invitations, jewelry, tips, wedding planning 1 Comment

Hello Lovely Ladies! Wedding Wednesdays just got more interesting on Marigold Events. We get many questions from brides asking for wedding advice. We will be selecting and answering “Question of the week” every Wednesday on Marigold Events. Ask your question by filling out our contact form on the right.

Q. I am having a small Sikh-American wedding in California. My fiance and I are planning our wedding on a budget and want to keep things simple but beautiful. How can I get Indian outfits in the US without spending an exorbitant amount of money? How should I go about selecting a venue? How can I save money on decor? What do most people do with their centerpieces after their wedding? I have looked at different Indian Wedding Invitation websites – is there a catch to them?

A. Dear Bride-to-be: Congratulations on your engagement! Here are some recommendations on how you can have a simple, and elegant wedding within your budget:

Look for Indian Outfits and Jewelry Online

Making a special trip to India or Indian Clothing and Jewelry Stores in the US for wedding shopping does require a higher budget. There are many Indian clothing and jewelry websites which can assist you here.

Here are some reasonably priced websites to order lehengas, sarees and beautiful Indian costume jewelry from*:

Home India: Bridalwear
Your Designer Wear
Utsav Sarees: Lehenga Section
Utsav Sarees: Jewelry Section

*Please note that Marigold Events is not affiliated with any of these websites.

Venue Selection: Questions to ask

When doing your venue research, it is important to check the following with the venue:

1. Do they allow outside/Indian catering?
Tip: Sometimes venues, like hotels, have Indian catering packages. Ask for them.
2. Can you have an outside decorator? Any special permission needed to install a mandap or for lighting a fire?
3. Does the venue rental cost include event rentals, such as tables, chairs, linen, china, glassware, flatware etc.?
Tip: Event rentals’ costs add up very quickly and will definitely increase your per person cost.
4. Can you bring your own liquor? Will you need a liquor license?
Tip: If your venue does not have arrangements to serve alcohol, and they allow outside alcohol, you can save money on liquor because you pay for what you use. You can always return the unopened bottles and it is not a fixed per person cost. Make sure that your venue does not charge corkage or bottle opening fee.
5. Will you need event insurance?
6. Which vendors will need permits and insurance?
7. Check with the venue if they will provide complimentary cake, centerpieces, votives, champagne toast etc.
Tip: Ask your venue if they will charge a cake-cutting fee.
8. How many hours will you get your venue for? Will that be enough time to do set up and breakdown?
9. If it is an outdoor venue, you should ask about a rain location.

When doing your venue research, it is important to keep the above questions in mind. Do your budget and cost calculations based on the answers you get.

Decor and Centerpieces on a Budget

If you want to save money on decor and centerpieces, I would suggest that you go for a venue that provides complimentary centerpieces and votives. You can also look into DIY Decor projects. For DIY centerpieces, I would suggest buying flowers from the whole flower stores to save money. Every big city has a wholesale flower market.

You can reuse some of your wedding decor for your reception as well. At the end of your reception, you can ask your florist to wrap your flowers for your guests to take away. Usually the rentals are taken back by the decorator. For example, if they used a big vase in the centerpiece, they will take it back.

Here is a list of Indian Wedding decor items.

Invitations: Online and DIY

The catch to the online wedding invitations is the shipping cost, which ends up being as much as the invitations. Here are some tips to remember when selecting and ordering your wedding invitations.

If you want to save money on your invitations, you can design your own. Here is DIY tutorial for making your own wedding invitations.

When planning a wedding on a budget, it is very important to stay organized and be on top of your budget. Before I sign off, here are two references for you: Indian Wedding Planning Checklist and Indian Wedding Budget. Good Luck with the planning process!

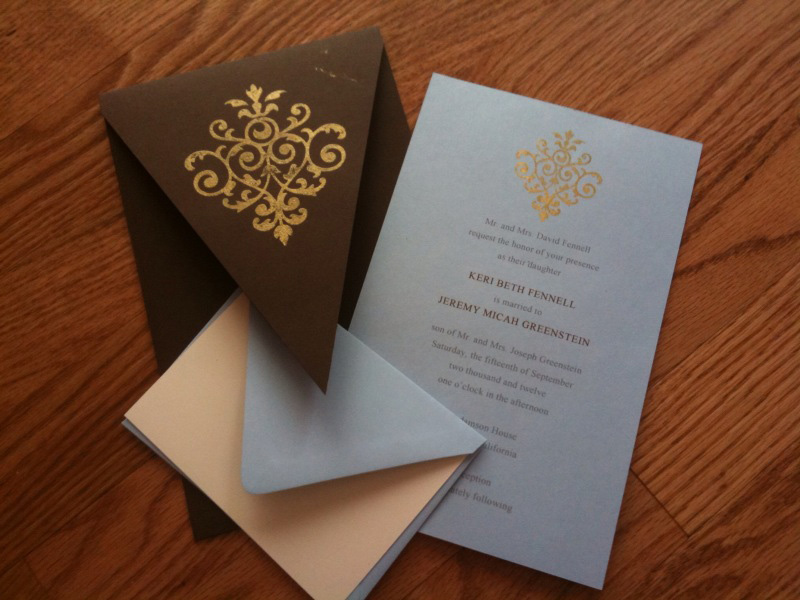
Contemporary Invites for the DIY Bride

DIY Projects, inspirations, invitations 5 Comments

This DIY tutorial will illustrate some unique techniques to create invitations. We will talk about rubber stamping and embossing. I will make some product recommendations, and also go through the steps.

Our end product will look like this:

Pointed Flap Enclosure with Embossed/Rubber Stamped Invited

Supplies:

1. Pointed Flap Enclosure (Chocolate)

◦ 5 1/2″ x 8 1/2″

◦ Special Feature = Makes a lovely presentation for wedding invitations and other special occasions.

2. Flat Paper (blue, lavendar, fuschia, white, ivory, cream)

◦ 8.5″ x 11″

3. Outer Envelope

◦ A9 ( (5 3/4″ x 8 3/4″)

4. Rubber Stamps (Same pattern, but in 2 different sizes) – Big Rubber Stamp, Small Rubber Stamp

5. Ink Pad, Clear for Embossing

6. Embossing Powder (We will use gold for this example)

7. Embossing heating tool

8. Paper Cutter

9. Pair of Scissors

10. Pencil

11. Ruler

Steps to create the invitation:

  1. Open a word Document in Microsoft Word on your computer. Change the orientation of the document to landscape by going to Page Setup.
  2. Make a table with one row and two columns on the document, such that one cell is 5 1/2″ wide and 8 1/2″ long in dimensions.
  3. Type out your invitation text in each of the cells using your favorite font. You can use Da Font to find some beautiful fonts that are not available out of the box.
  4. Print out the document on the Flat Paper (8 1/2″ X 11″).
  5. Using paper cutter, cut out the paper along the edges of the document you created.
  6. Now take each individual invitation, rubber stamp and ink pad. Apply clear ink to the smaller rubber stamp and apply it at the top center of the invite.
  7. Now we will begin the process of embossing. We will take the gold embossing powder and pour it over the stamped area. The powder will stick to the stamped portion. Now remove the excess powder by pouring it back on another sheet of paper.
  8. In order to emboss the stamp, we will use the heating tool. Plug the heating tool and test the temperature on your hand. Once its hot enough, then use it like a hair dryer over the stamped area with the embossing powder on it. You will notice that the stamp area will start getting embossed.
  9. Repeat the last three steps on the flap of the pointed envelope with the bigger stamp.
  10. Once the embossing has dried out, you can place the invite, along with the enclosures for RSVP, in the pointed inner envelope.
  11. Use the outer envelope to address the invitation.
  12. Note: Please make a sample or two before you buy supplies in bulk. Also, you can get the printed paper cut in bulk at Kinkos.

Your invitation is now ready! It is simple and elegant. The stamp looks Indian, but contemporary. Get ready to wow your guests!


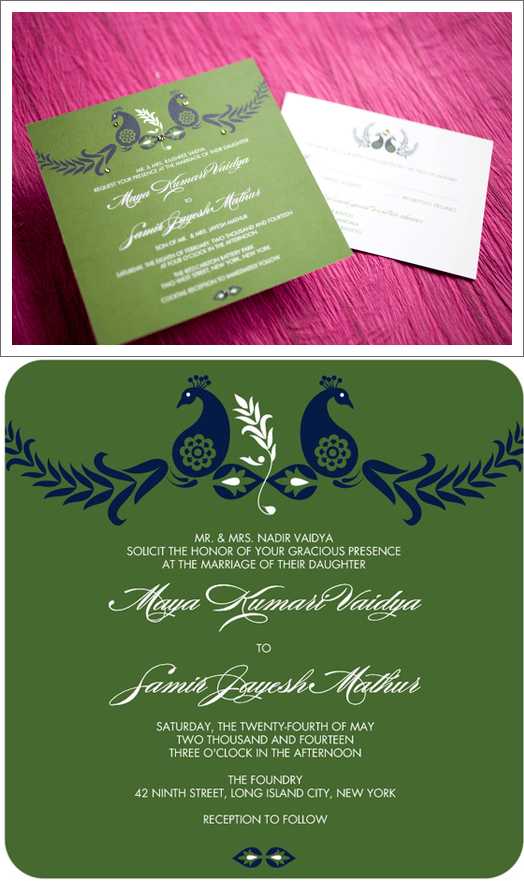
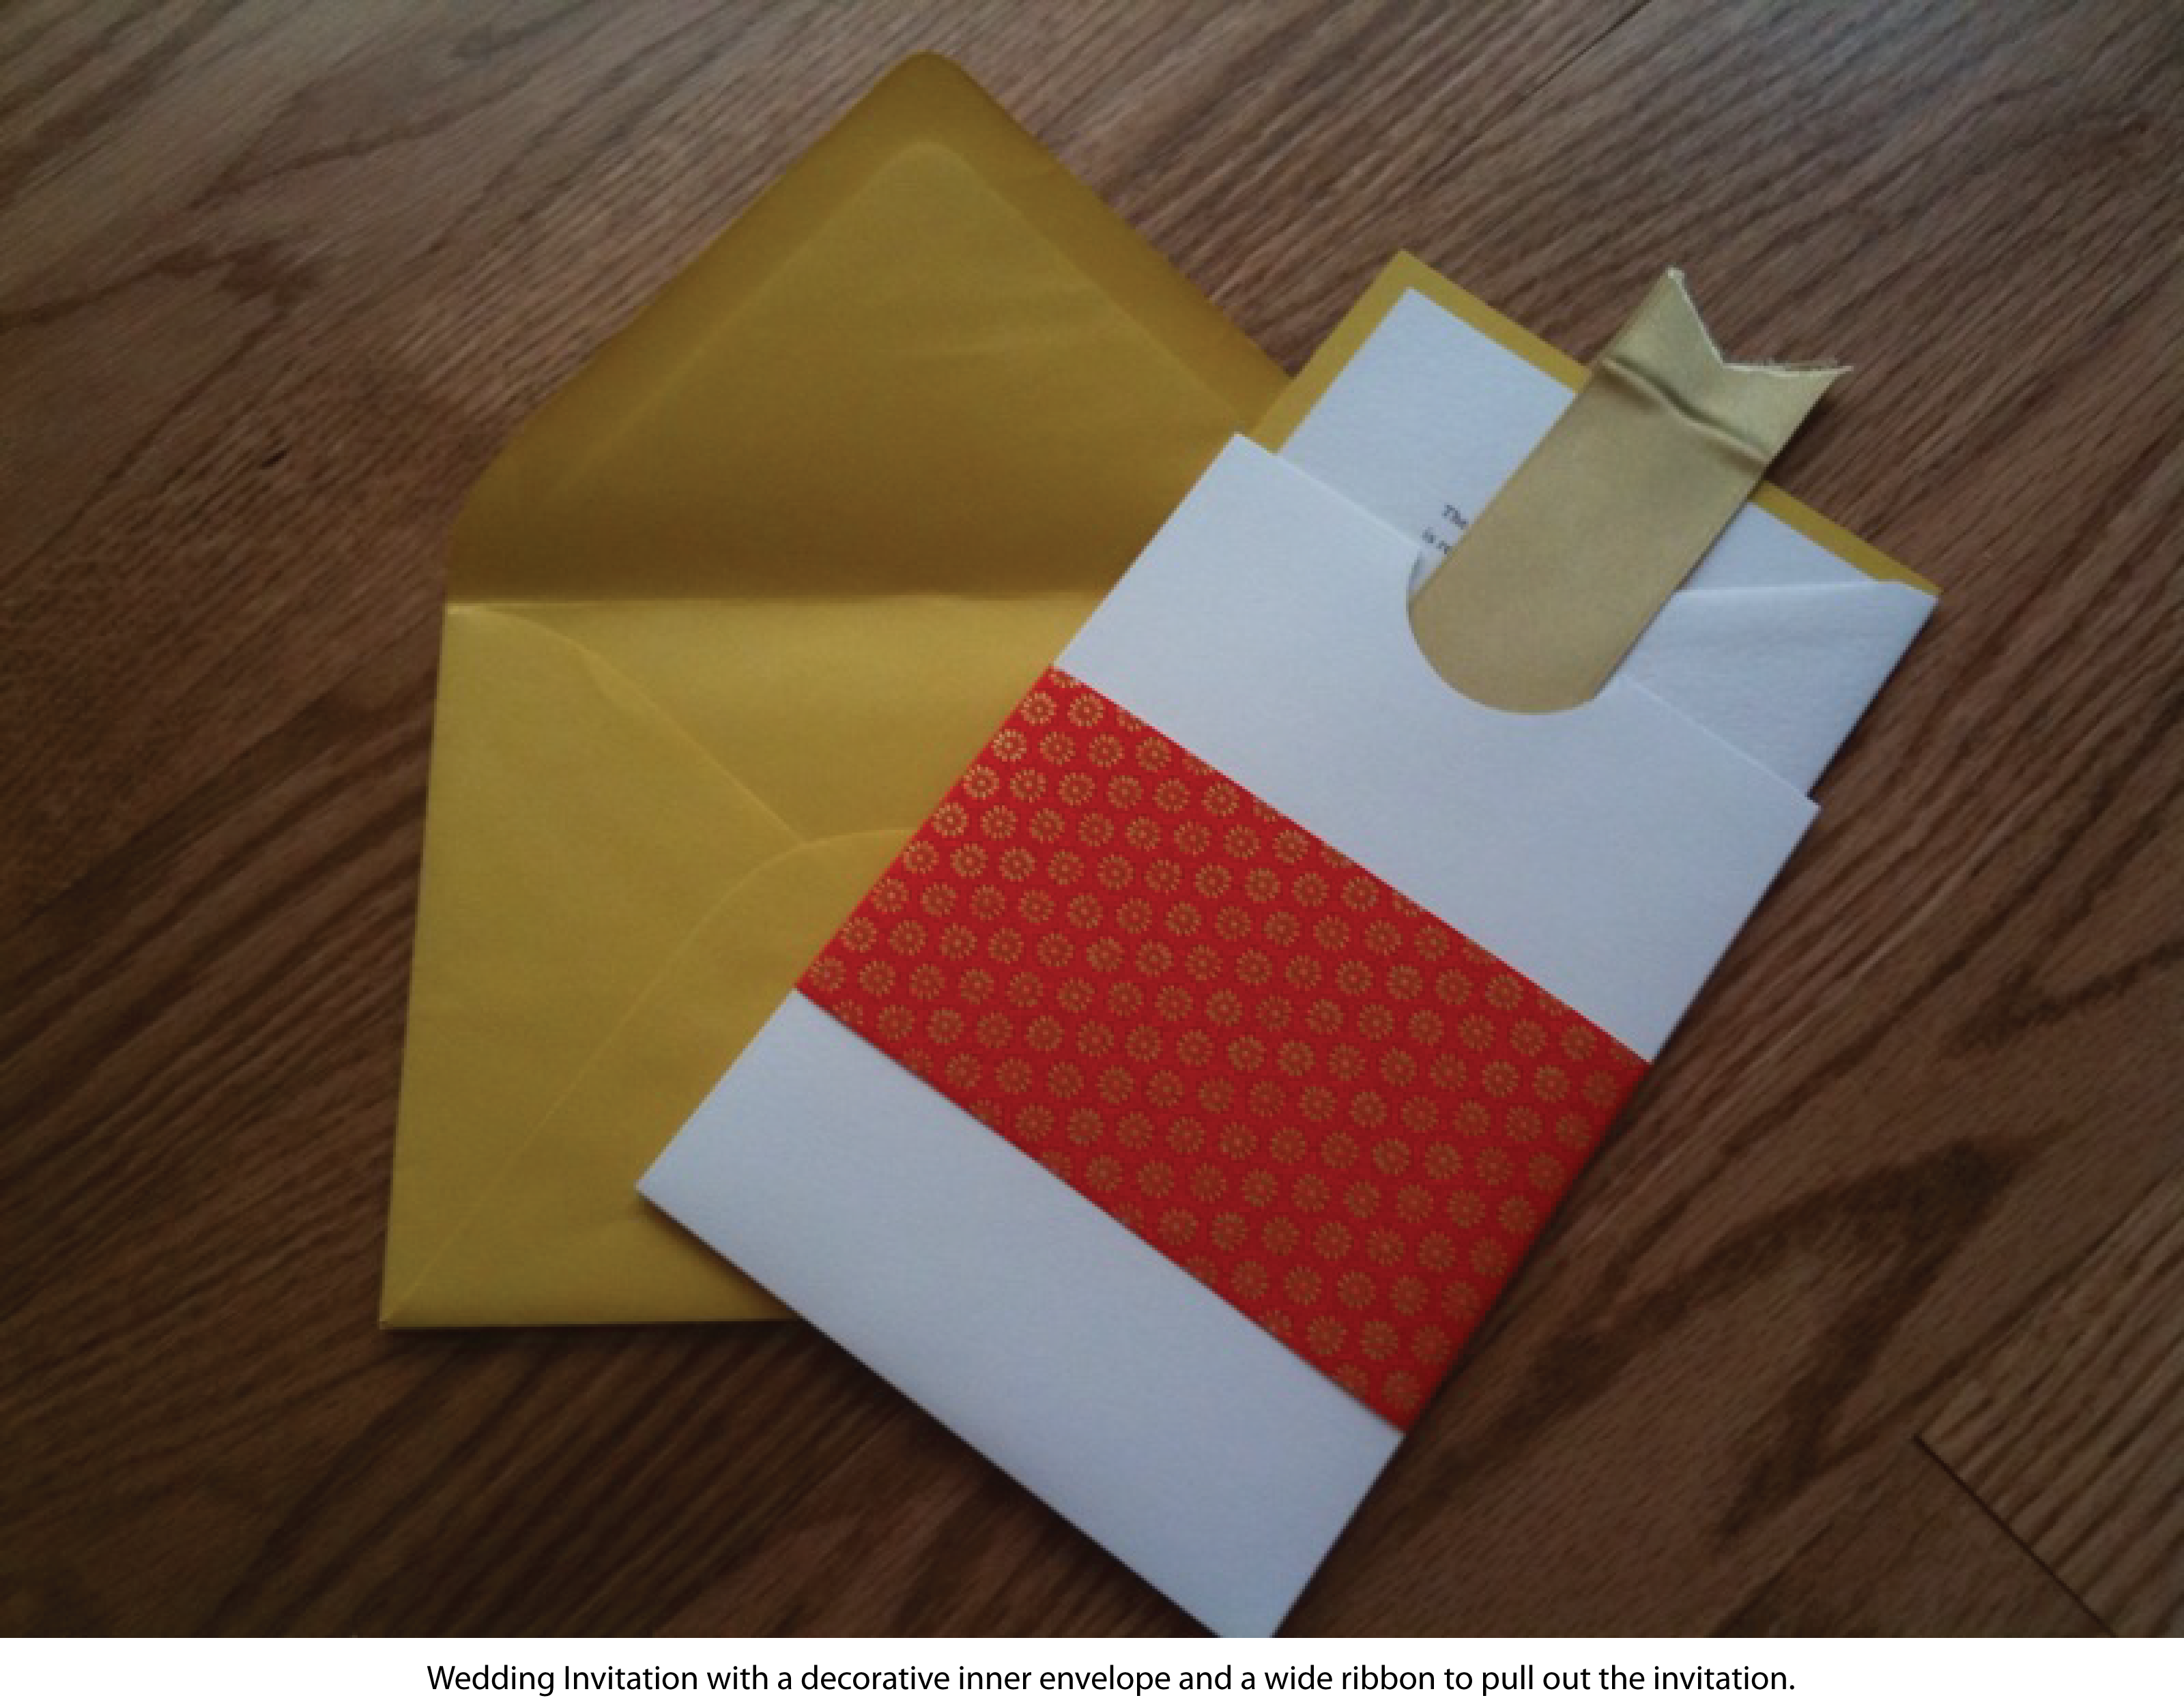
How to make your own DIY Wedding Invitation

DIY Projects, inspirations, invitations, stationary 5 Comments

Are you a creative bride? Do you want to add your personal touch to your invitations? Do you want your invitations to be unique? Look no more! We have the perfect DIY invitation ideas, which will set your wedding invitation apart.  I will show you some techniques and point you towards some resources, with which you can make your own invitations very easily. Most of the supplies and inspiration that I have used for the invitation created in this blog post are from Paper Source. You can order your supplies from their online store, or go to their many locations around the country.

Our end product will look like the following:

DIY Wedding Invitation with Decorative Handmade Paper and Ribbon

Supplies:

  1. Half Moon Enclosure
    • 5″ x 7″
    • Special Feature = The half circle cut out allows a portion of your invitation to peek through the top – a great place to include a small graphic element.
  2. Flat Paper (white, ivory, cream)
    • 8.5″ x 11″
  3. Flat Card in color of your choice
    • A7 (5″ x 7″)
  4. Outer Envelope
    • A7 (5 1/4″ x 7 1/4″)
  5. Decorative Paper (or Handmade Paper)
  6. satin ribbon in color of your choice
  7. Paper Cutter
  8. Pair of Scissors
  9. Double Stick Tape
  10. Pencil
  11. Ruler

Steps to create the invitation:

  1. Open a Word Document in Microsoft Word on your computer. Change the orientation of the document to landscape.
  2. Make a table with one row and two columns on the document, such that one cell is 4 3/4″ x 6 7/8″ in dimensions.
  3. Type out your invitation text in each of the cells using your favorite font. You can use Da Font to find some beautiful fonts that are not available out of box.
  4. Print out the document on Flat Paper (8.5″ x 11″).
  5. Using the paper cutter, cut out the paper along the edges of the document you had created.
  6. Mount the Flat Paper on the A7 Flat Card using double stick tape. This creates a contrast and a layering effect.
  7. Now take the decorative paper and cut out a strip of paper that is 3-4 inches wide and long enough, such that it wraps around the half moon enclosure completely.
  8. Using double stick tape, adhere the decorative strip around the half moon enclosure. This adds a beautiful accent to your envelope.
  9. Now take the wide satin ribbon which is 2.5 times the length of the half moon enclosure (approx. 12.5″). Make sure you cut the ribbon into a “V” shape, so that the edges don’t fray. It also makes it look more professional.
  10. Wrap the ribbon length wise along the invitation card, right in the middle, and insert it in the half moon envelope. The invitation can be pulled out using this ribbon and adds a nice touch to the invitation.
  11. Now put the invitation in the outer A7 envelope.
  12. Note: You can create your other enclosures for RSVP, directions in a similar fashion.

Your invitation is now ready to wow your guests! Let us know what you thought of this DIY tutorial.


Indian Wedding Planning Checklist

Advice, DIY Projects, Favors, Planning Checklist, Shopping in India, Trousseau, cake, centerpieces, colors, decor, henna, invitations, overlays, stationary, tips, wedding planning 7 Comments

Congratulations on your engagement! Wondering where to start from? Here is a checklist of items which will walk you through your wedding planning process. According to 2008 Wedding Industry Facts, the average length of engagement is 16 months (Courtesy: Hudson Valley Weddings). For this checklist I am going to assume an eight month engagement and wedding planning period, since Indian engagements are usually shorter. Your first month planning will definitely be the busiest. Even though the list is top heavy, don’t be afraid as the more work you do in the beginning, the less you will have to worry later.

Week 1

  1. Pick a Date/Weekend: Give yourself enough time for preparation when picking a date. Also, think about the season you would prefer to get married in.
  2. Estimate your Wedding Budget: Are you planning on using your own savings for the wedding? Are the parents chipping in? Now is a good time to get to talk to your fiance and both families to get the finances together for the wedding.
  3. Finalize all the events: There are many events associated with an Indian Wedding Celebration. Do you want to have an engagement party, haldi, mehendi, sangeet in addition to the wedding and reception? Now is a good time to decide.
    • Tip: Take your budget into consideration when deciding the number of events and how they will be scheduled on the weekend to accommodate your out of town guests.
  4. Estimate the number of guests and start a guestlist: Once you have a set budget in mind, you should estimate how big of a wedding you want. This will help you decide the other planning aspects of your wedding.
    • Tip: Make a spreadsheet of all the guests. I would suggest using Google Docs and use the following heading items for your spreadsheet, which accounts for all the details related to your guests: Guest Family, Number of people invited, Address, Email Address, Phone Number, Events invited for, Out of Town?, Save-the-Date sent?, Invitation Sent?, Gift received, Thank You Card Sent?
  5. Hire a Wedding Planner (optional): If you want a planner to assist you find you your venue and other vendors, go ahead and book your wedding planner in the first week itself. This will ensure that you get maximum benefit out of hiring a planner. Make sure you get referrals from family and friends. Yelp and Wedding Wire are great places to start looking as well. A lot of planners have negotiated (discounted) rates with vendors, which can work in your favor. On the flip side, they may steer you towards the vendors with whom they have a relationship.
    • Tip: Most planners and even other vendors offer a discount if you pay them the full amount when you sign the contract. Consider doing so only if you are sure about your planner/vendor selection.
  6. Start researching Venues: Finding venues for all your wedding events, which are open for the dates you picked can be very trying. Get a head start so that you can book the wedding venue of your dreams!  Schedule appointments to go visit the selected venues and start shortlisting.
    • Tip: Find out the venue requirements and policies for lighting candles, havan rituals/ fire, alcohol, parking, vendor and event insurance, cancellation or postponing the event.

Week 2

  1. Choose your bridesmaids and groomsmen (optional): If you choose to do so, select your bridesmaids and groomsmen and invite them to be in your wedding party. It is always nice to send a hand written note to invite your friend/relative to your wedding party, followed by a phone call. Once they confirm, it’s a good idea to get their measurements for their outfits.
  2. Pick a theme/colors and start collecting ideas: If you choose to do so, pick your colors/theme for your wedding. Regardless of whether you are having a theme of not, start gathering ideas for your wedding. Look through magazines, wedding planning blogs, even talking to your friends and cousins who recently planned their wedding.
  3. Send out Save-the-Dates: Once the guestlist is finalized, send out your Save-the-Dates. You could go with something which you Do-it-Yourself, or even go to a local paperie/paper store and get them ready to be sent out. Often times, brides go with magnets with a picture of them and their fiance, or even very creative DIY Save-the-Dates according to their theme.
  4. Plan your Engagement Party (optional): If you decide to do so, start planning your engagement party. You may want to have it at your parent’s house or backyard if the weather is nice, after taking the guestlist into consideration. Think about what kind of party you want: Brunch/ Hors d’oeuvres/Dinner.

Week 3

  1. Finalize the Venue: By this time you should have selected your venue. Sign the contract and make the deposits.
  2. Start your Wedding Registry: Decide the stores or online website where you would like to set up your wedding registry.
    • Tip: Most people go with Macy’s, Crate and Barrell, Bed Bath, Target,  Beyond and other big department stores. Personally, I recommend online websites like myregistry.com for setting up your wedding registry, as it gives you a lot more flexibility. You can add any product online and place it on your registry. Moreover, if you are a smart shopper, you can shop for the best deal to save your guests money!
  3. Wedding Website (optional): Set up your wedding website with all the details of your wedding. You can purchase a domain and server space from website hosting companies like bluehost.com, godaddy.com, 1and1.com with your and your fiance’s name, for example: nehaandkart.com. Once you have the domain, you can have a friend/cousin/web developer or even yourself create a wedding website with details such as how you met, proposal, photo gallery, wedding venue and details, link to registry, RSVP, guestbook etc. Alternatively, there are many wedding planning websites, like weddingwire.com, which already have templates for wedding websites, and all you have to do is enter the content and the website is automatically created for you. You can choose to forward it to your own domain rather than the one generated by the website company. Email the website link to your friends and relatives.

Week 4

  1. Start Researching Caterers: Put a little thought into your wedding menu. Are you thinking live stations, ice sculptures, chocolate fountain, fondue, specialty appetizers and drinks or simple buffet? Browse through directories of local restaurants, which fit your requirements and schedule tastings. Get per person estimates when you go for the tasting. You might also want to talk to your caterer about drink packages. Make sure that the caterer is licensed by your venue.
  2. Start Researching Event Decorator/ Florists/ Mandap: Based on your theme, ideas and colors, start thinking of decor ideas. Make a list of things you need from a decorator/florist. Are you going to have special lighting for your events? Talk to various florists for centerpieces and flowers for the ceremony and reception. Also start looking for overlays, Indian event decorations, Mandap, stage for Sangeet and Sweetheart table set up etc. Get estimates for everything.
  3. Start Researching Photographers: Good photographers are often booked months in advance. Get on your game and schedule meetings to book your photographer. You should definitely look at the samples of the different photographers so that you know their style (posed, photojournalistic etc.). You should also try to negotiate a photo package for all your wedding events as you don’t want to miss the special moments. Important occasions for photos include Engagement Portraits, Engagement Party, Mehendi, Sangeet, Getting Ready Pictures, Pictures of just Bride and Groom on the Wedding Day, Pictures with the Bridal Party, Ceremony, and Reception. You might want to ask the photographer for the rates of an assistant, should you need one.
  4. Start Researching Videographers: Go for a videographer who has shot Indian Weddings before because they will have a good idea about the lineup of events on your wedding day and would not miss shooting your important moments. Also you would want to discuss how the media of the video: HD/ Blue Ray DVD/ Video Tape etc, whether you want raw footage or the edited video or both etc. Decide which events you need the videographer for and whether they need to have assistants or not.
  5. Start Researching DJs: Do your homework to find a good DJ. Talk to different DJs to get a vibe of what kind of music they play and how often they switch it up. If you need a projector for slideshow, cables to hook up your computer to the projector, special sound system, other tech equipment, you might want to talk to the DJ and negotiate a package for that and all your other events. Also, ask the DJ if he can provide dhol/ entertainment/ music for the Baraat. It is best to select a DJ based on a performance that you have seen.
  6. Start Researching Event Rentals (depends on the venue): If you are having your wedding at a museum, hall or a special location, most probably you would need to rent out everything needed for your event, from china, glassware, tableware, tablecloths to tables and chairs. This can get pricey depending on your guestlist and you definitely need the correct estimates for the number of each item to be rented with extras to spare. Do your utmost to research the most reasonable event rental company in terms of finding the best choice of rentals, as well as a company which has relaxed policies. Sometimes your caterer can provide some good referrals for the event rental companies.
  7. Pick out your invitations: Start looking at different Indian Invitations Websites to look for the perfect invitation. Also, read our article on how to select a wedding invitation for some useful tips. Once you have a winner, finalize the invitation text (include your website and registry information on the invitation), and order the invitations as it takes a couple weeks for the order to be processed and shipped. You want the invitations at least 4-5 months before the wedding, so that you have enough time to address them.

Month 2

  1. Finalize your Caterer, Event Decorator/ Florist/ Mandap, Photographer, Videographer, DJ, Event Rentals: You should have these vendors finalized and locked in so that you can start planning the wedding details with them. Review the contracts thoroughly before signing. Make sure they provide a reasonable alternative person/company to fill in case they are sick or under circumstances beyond their control.
  2. Book your Priest/ Pundit: Based on the kind of ceremony you want, book your priest. Its always good if the priest can speak in English and translate the ceremony for the guests. Confirm their dakshina or honorarium and also the date of the wedding.
  3. Select you Cake Vendor and Cake Design: If your venue or caterer does not provide one, then start looking for a cake vendor. Regardless, you will need to pick a design for your cake.
  4. Make the Arrangements for Baraat and other transportation: Reserve the horse carriage, get permits if need be for the Baraat and make arrangements for limo/transportation for the day of your wedding. You may also want to book a shuttle to transport your guests to the wedding venue if different from the accommodation.
  5. Book your trip to India (optional): If you are doing your wedding trousseau shopping in India, then book your plane tickets and make appropriate arrangements to take time off of work etc.

Month 3

  1. Select a vendor for your Mehendi, Hair, Make up and Arranging your Dupatta or Sari: Make sure you have make up and hair trials, before you select the vendor. Interview them to make sure that they can arrange transportation to come to where you are. Also, you might want to bring pictures and discuss with them the way you want your mehendi, make up, hair, and dupatta arranged.
  2. Select Wedding Outfits for the entire bridal party and Jewelry Sets for yourself: If not going to India, find a local store or travel to a city with huge Indian diaspora in the US to purchase jewelry sets for yourself and traditional outfits for yourself, your fiance and your entire bridal party. Also start looking into suits and tuxedos for the groom and groomsmen.
  3. Travel to India to purchase your Wedding Trousseau (optional): Read our article on how to shop for your wedding in India for special tips.
  4. Block Hotel Rooms for out of town guests: Get a block of rooms for a discounted rate for all of your out of town guests. Update your website to include the hotel information and the code to get the discount.
  5. Honeymoon Suite: Book accommodations for your wedding night.

Month 4

  1. Purchase your Accessories: If not going to India, then start looking for matching purse, bindis, bangles, and footwear.
  2. Start planning and book your honeymoon: Decide on a destination, and book your travel, and hotel for the honeymoon. If you are traveling internationally, make sure you have valid passports and appropriate visas/ other travel papers, vaccinations etc.
  3. Finalize your Menu and Service details with your caterer
  4. Finalize your Decor Arrangements

Month 5

  1. Get your invitations ready and Mail them: Address all your invitations and put stamps. This process can take a good week, especially if you are still in process of compiling addresses and have a huge guestlist. Use vellum or metallic labels to print addresses. You might also want to consider calligraphy.
  2. Order your wedding rings/bands
  3. Start looking for favors: Read our article on suggestions for special wedding favors.
  4. Childcare for your Ceremony and Reception (optional): If you have many guests with babies and small  children, you might consider making arrangements for them.

Month 6

  1. Alcohol and Bar Arrangements: Order liquor/alcohol for your event if you are not getting it from the caterer or venue. You might have to get a permit to serve your own alcohol at your venue and hire bartender as well.
  2. Prepare Ceremony Programs and Other Stationary: Design the proof of concept for your ceremony programs. If you are designing any other stationary, scrapbooks for display etc., you should consider doing it now.
  3. Research Marriage License Requiremnts: Also schedule a blood test appointment, if required by your state.
  4. Song for First Dance: Select the song for your First Dance. Consider taking dance lessons or choreographing it yourself.

Month 7

  1. Purchase your Guestbook, Pen and Pen Holder
  2. Purchase gifts for your bridal party and close family members
  3. Contact close family and friends for Sangeet Performances (optional)
  4. Get all the sari and lehenga blouses stitched: You should do this for yourself and your bridesmaids.
  5. Make sure that all your outfits fit properly: You still have some time to get the outfits tailored to fit you in case there have been a size change.

Month of the Wedding!

4 Weeks Before

  1. Have Sangeet Performers submit their music to you
  2. Send a Song List to the DJ: Make a list of your must-play songs and do-not-play song list and send it to your DJ. You should also send all the sangeet songs and the song for your First Dance to make sure the DJ has all of your music.

3 Weeks Before

  1. Call guests who have not yet RSVP’d and get the final head count
  2. Determine the order of your receiving line, if you are having one
  3. Prepare a timeline for all your wedding events
  4. Prepare a list of assignments for your bridal party and family members

2 Weeks Before

  1. Give the final head count to all your vendors
  2. Give the timeline of wedding events to all the vendors, members of your bridal party and family members helping
  3. Create your seating chart and make the place cards: Give your seating chart to the vendors in charge of directing guests to their tables, arranging the chairs, tables, table numbers and place cards.
  4. Prepare your toasts and thanks to family and friends
  5. Confirm all your final payments and have them ready to be mailed out or handed over to the vendor

Week of the Wedding!

  1. Hand over all the favors, guestbook, placecards, programs etc. to the event planner or the person in charge of arranging them
  2. Put together an emergency kit: This should contain Aspirin, Hairspray, Make up, Safety Pins, Mints etc.
  3. Pack your suitcase for the honeymoon
  4. Get pampered at a Spa
  5. Enjoy your Wedding Celebrations!

After you come back from your honeymoon

  1. Ensure all your vendors have been fully paid: As a courtesy you may review them on wedding planning websites.
  2. Arrange for your outfits to be cleaned and preserved
  3. Write all your Thank You Notes: Traditional etiquette gives you an 8 week grace period.
  4. If you choose to do so: Do all the paperwork to change your name, and arranging to combine finances, insurance policies etc.

I hope this checklist is comprehensive enough and will be useful for you in planning your wedding. As usual, please comment on this entry with your suggestions or email me  at neha@marigoldevents.com.

Featured Wedding: Sneha and Rajat

Advice, DIY Projects, Favors, Featured Wedding, Shopping in India, colors, decor, inspirations 6 Comments

Couples do meet in unique places and situations, and so is the story of our featured couple, Sneha and Rajat. Sneha and Rajat met in college during a fire drill! Once the two were ready to tie the knot, Rajat proposed Sneha on an Eastern Caribbean Cruise after asking her parents for permission. I had the pleasure to talk to Sneha about her engagement and wedding planning experience. I will share the highlights of her wedding and some of her planning tips with you.

engagement portrait

Engagement Portraits can be a lot of fun!

When starting to plan their wedding, the first thing Rajat and Sneha did was have their engagement portraits taken. Tip #1: Engagement portraits are great for when you are designing your Save-the-Dates, Favors, Guestbook or just for display at the wedding/reception. The couple planned their engagement party at the Heritage Club in the DC Metro Area.

engagement

The Heritage Club has a Rajasthani themed decor and is perfect size for an engagement celebration.

As a part of their engagement celebration, Sneha and Rajat hired a limo to go on a tour of DC with their friends. Here is a beautiful shot of both at the Washington Memorial taken by one of their friends:

Rajat and Sneha at the Washington Monument

Picture Perfect!

As is the dilemma of most couples, Sneha and Rajat were faced with the same: Venue for the wedding! The couple wanted a small and intimate wedding with their close family and friends and were not having any luck finding a venue in the DC area. While Sneha and Rajat were visiting Sneha’s parents in California, they decided to take trips to the wineries nearby. They were fascinated by this one winery in particular called Hecker Pass Winery in Gilroy, California. The weather there was gorgeous and the owner of the winery was very hospitable. Sneha and Rajat were sold and decided that they wanted to have a destination wedding at the winery. Tip #2: A unique destination wedding venue could be a Winery; the weather is gorgeous and its perfect for a scenic and intimate wedding.

Candid Shot at the Sangeet

The wedding was a 3 day affair, where the couple had Haldi, Mehendi, Sangeet, Wedding and Reception. The Sangeet was held at the winery, where the decor was a typical Indian seating set up of “gaddas” and cushions. Sneha stressed how this was a group effort and everyone contributed towards the Sangeet arrangements. Tip #3: Don’t be afraid to ask for help and delegate the responsibilities, group effort often has the best results!

For the Sangeet entertainment, the couple hired live singers combining Punjabi Dhol, folk, bollywood and dance in a unique live performance. They sang Bhangra, typical Sangeet songs, Bari Barsi, Kala Shah and many other numbers, which all the guests really enjoyed. They had a lovely favor basket of “chudis” and “bindis” for the ladies.

Sangeet Favors: Bindis and Bangles

Sneha chose very trendy and unique colors for her wedding: pink and chocolate brown. The colors are rarely seen in Indian wedding, and I must say that everything was put together beautifully at the wedding using that color scheme. One can tell how meticulously Sneha planned the wedding by the attention to detail. Sneha made some beautiful welcome baskets using the colors of her wedding for the guests staying at the hotel. The basket contained a wine bottle from the winery with a custom label designed by the couple, and some chocolates. Tip #4: Apply your wedding color scheme also to the details like gift bags, money envelopes, programs, welcome baskets etc.

welcome basket

Welcome baskets: Coordinated with the Colors and Theme

I loved the way the pink organza fabric was draped around the chivari chairs that were used in the ceremony. For the decoration along the aisle, floral balls made of roses were hung on shepherd’s hooks. Tip #5: You can add beautiful aisle decorations by using shepherd hooks. You can use floral balls, lanterns, ribbons – the choices are endless!

details

The beautiful details

Sneha, along with her bridemsaids, spent hours designing the concept for her wedding program. The end result was fabulous! Tip #5: Using ribbons hang your wedding programs from the ceremony chairs. This adds to your decor.

Wedding Program

Sneha's DIY Ceremony Program

Rajat and Sneha had five bridesmaids and groomsmen. The bridesmaids wore coordinated pink saris with golden sequins border and small flower shaped motifs stitched all over it. Sneha said that she was having the hardest time finding coordinated saris for all her bridesmaids in India. She said it’s nearly impossible to get two saris with exactly same color and design ready made. So on her shopping trip to India, Sneha got the saris made from scratch! She had to buy the sari material, get it dyed pink, and finally get the border and motifs stitched to each sari. I think this is a great idea for all the brides who want the exact same sari for their bridesmaids. Tip #6: Simplest way to have the same sari for every bridesmaid – Buy white material, borders and trimmings, Dye the material with your choice of color, get the borders and trimmings stitched on to the sari.

Here comes the bride

Here comes the Bride

Sneha wanted a brown mandap for the wedding, to go with the colors chosen by her for the wedding. It was impossible to get one in the States, and so on her trip to India, she got one stitched. She got the measurements and instructions for the mandap from her decorator and got them stitched for a very reasonable cost in India. During the wedding, the mandap was draped on pillars and hooked on for extra protection. Tip #7: If you have unique wedding colors, consider getting your mandap stitched in India. Ask your decorator for the measurements. Check out the beautiful mandap:

ceremony

Ever seen a chocolate brown mandap before?

Sneha mentioned that one her memorable moments from the wedding was from the “joota chupai” ceremony. She said that the groomsmen and bridesmaids were going back and forth with the shoes and negotiating the amount for the shoes. The final deal between the two sides was for all the bridesmaids to dance around Rajat to “Joote do Paise lo” and then get the money!

Joota Chupai

Paise De Do, Joote Le Lo!

Since the wedding was at the winery, that ended up being the underlying theme – from the welcome baskets, to the table numbers, which were named after different wines. Tip #8: To add a unique touch, consider having table names instead of table numbers based on your theme.

Wedding Portrait

Rajat and Sneha got portrait shots for all of their major events

Another DIY project that Sneha did was putting together their favors. Sneha put together a CD of her and Rajat’s favorite songs and put them in a beautiful case that she designed herself. Sneha used cdprintexpress.com for the production of the favors.

favors

Beautiful Cherry Blossom Design for CD favors

Here are some beautiful pictures of Sneha and Rajat’s Reception:

First Dance: "Pehli Nazar Mein" from the movie Race

Beautiful Centerpiece on a chocolate brown overlay

Reception Setup

Custom Guestbook

Hope Sneha and Rajat’s gorgeous wedding photos and planning tips will be useful and give you ideas to plan your beautiful wedding!  (Photo Credits: Sandhya Photography)

If you would like to submit your wedding, please contact us through this form or email me at neha@marigoldevents.com.

Fabulous and Personalized Favors

DIY Projects, Favors, inspirations, marigold events, wedding planning 5 Comments

Wedding Favors are small gifts, given as a token of gratitude to guests from bride and groom during a wedding ceremony/reception. The tradition of giving favors is a very old European custom, where a small trinket box was filled with sugar (believed to contain medical benefits) cubes or confections were distributed. We will put an Indian twist to this tradition and present some creative favor ideas. Get ready to wow your guests with your unique favor ideas!

Personalized Chai Kit

Chai is a favorite Indian beverage of choice for many people. How cool would it be to have that as a favor for your wedding. The presentation is key here. A Personalized Chai Kit could be made by putting all the dry ingredients of tea in small organza bags, and then placing it in a small wooden box. You can choose from a variety of boxes online, or even get them from India. One of my favorites is the Gemstone Picture Box, which can be later used as a jewelry box. These boxes come in different designs and look absolutely gorgeous. Now to add an extra personal touch, type out your own Chai recipe and insert it in the Chai Box. Your very own Personalized Chai Kit is now ready.

Personalized Trinket Box

Trinket boxes make a great gift and also look beautiful on your place settings. Check out this Golden Lac Box with Beads and Mirror:


You can fill these boxes with mouth freshners, pot pourrie, small charms, hershey kisses or any candy of your choice. To add a personal touch to it, you can insert seating card or a personal note on the top of the box for your guests. To make the seating card or note, buy some card stock or printed paper, print the guest name or personal note, and then use a circle paper cutter to cut out the name or the personal note. Once you insert the the card on the top of the box, you have a beautifully assembled and personalized trinket box.

Personalized “Lucky Elephant” Tea Light Holder

Check out this gorgeous “Lucky Elephant” Antique Ivory-Finish Tea Light Holder.

The elephant is beautifully detailed and crafted, and comes with a tea light and in a display gift box which includes a rich, sheer, organza ribbon and bow. These tea light holders serve a dual purpose, where besides being a gift for your guests, they can be also used as a personal note/ seating card/ photo holder (There is a lipped rug under the howdah for this purpose). This favor will look absolutely stunning on your place setting. Not only does it look royal, but is also considered a source of luck and good fortune, as the elephant has a raised trunk.

We hope you liked our favor ideas. We would love to hear your favor ideas on our blog!

DIY Tutorial: Designing a Henna Inspired Reception Program using Microsoft Word

DIY Projects, henna, inspirations, marigold events, stationary, wedding planning 14 Comments

Continuing with our Inspiration from henna, we will design a Reception Program. For Mehendi inspired program, you will want to have a palette of rich colors. Rusts, Golds, Silvers, Magenta, Reds are all good to start with. Once you know which color you will use, based on the number of guests that are attending, buy enough paper. Paper-Source is one of my favorite stores to buy stationary from. They have great products for DIY projects. Following is the final product of this tutorial:

Henna Inspired Wedding Reception Program

Follow along this tutorial to create your custom henna inspired reception programs. Remember to save your document at regular intervals:

  1. Open a standard 8.5″ X 11″ document in Microsoft Word.
  2. Select Page Setup from File Menu to change the orientation of the paper from portrait to landscape.
  3. Insert a Table in the document with 1 row and 3 columns.
  4. Now position the table in the top left corner and stretch the table all the way to the bottom right corner, such that the page is divided into three equal sections.
  5. If you want to remove the bounding lines of the table, then right click on the table. Select Borders and Shading. Now select the custom setting, and get rid of the side borders, and just keep the border that divides the page into three equal sections.
  6. Use the Insert Menu > Picture > From File to insert your motif/pattern in the document. Following are the images you need to make your henna inspired program.   Mehendi BorderMehendi Flower
  7. Right click on the image and select Format Picture to change its size, alignment, layout etc.
  8. After formatting the images, you have your template ready. Following is what the final template looks like.
  9. You can now add text using your favorite font. One of my favorite fonts for Wedding Stationary is Edwardian Script ITC. An excellent website to download any font you can imagine is: DaFont.
  10. Your programs are now ready to be printed on your favorite colored paper. Always test print on one sheet of paper before sending a large number of copies to be printed.
  11. Cut your programs with a paper cutter. Alternatively, take them to Kinkos or Staples, and have them cut the stack for you. Since one sheet has two lines, the whole stack would just need two cuts and should be around $1.00 per cut.

Hope you had fun following along this DIY tutorial. Let us know what you think and if you have any questions.